Banana Breadcrumb Cake

20231002_163253

Have you ever made a recipe using breadcrumbs instead of flour?
This is what we are doing today. You won’t regret making this, promise.

You’re gonna need:
-Food processor (that is reasonable in size – tiny ones won’t do for this recipe)
-Oven
-13x9x2 inch baking pan
-Foil
-Kitchen scale
-Bowls
-Spatula

Ingredients:
-380g bananas, cut into slices
-3/4 cup unsalted butter
-2 cups granulated sugar
-4 eggs
-2 cups (plain) breadcrumbs
-2 tsp baking powder
-1 tsp banana extract

Instructions:

1- Preheat the oven to 340°F. Line your baking pan with foil, covering the sides as well. Set aside.
2- In a bowl, combine breadcrumbs and baking powder. Set aside.
3- In the food processor, beat butter and sugar until creamy.
4-With the food processor still on, gradually add in the banana, make sure that there are no chunks of fruit left, turning everything into a paste. Might be a good idea to scrape the sides once or twice.
5- Again, with the food processor on, add in the eggs, one by one, followed by the extract.
6-Gradually add in the breadcrumb mix, and when you are done, pulse the whole thing for just a couple of seconds to make sure everything is smooth.
7- Pour the batter into a big bowl and stir it with a spatula to make sure everything is very well combined. That being done, pour your batter into the lined baking pan.
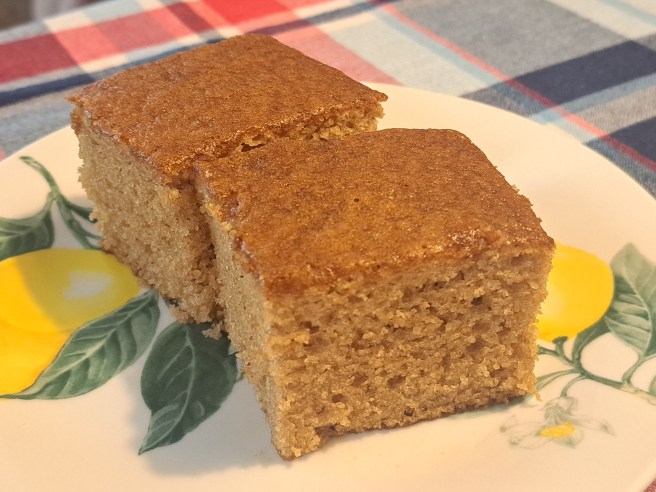
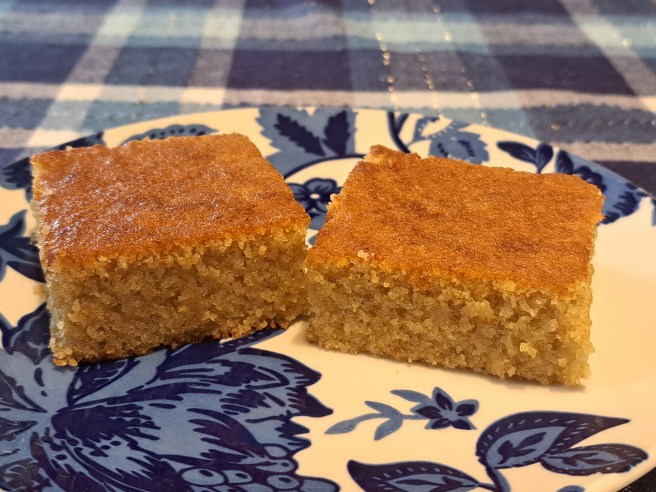
8-Bake it until light brown on top, also passing the toothpick test. That should take about 38 to 40 minutes.

Enjoy!

That’s it for today
Don’t forget to follow us on Instagram!
Until next time!

Orange Carrot Loaf

20230730_165552

How are you guys doing?
Today we brought you guys a loaf, a “bread”, a cake. Call it whatever you want. What matters is that it’s delicious.

You’re gonna need:
-Microwave
-Oven
-Zester
-Food scale
-Food processor
-Bowls
-Silicone spatula

Ingredients for the loaf:
-3/4 cup orange juice (no sugar added)
-3.5oz (100g) carrots, chopped
-3 eggs
-1 1/2 cup granulated sugar
-1 1/4 tsp naval orange zest (about an orange)
-1/2 tsp orange extract
-1/3 cup unsalted butter, at room temperature
-2 cups all-purpose flour
-1/4 tsp salt
-1 1/2 tsp baking powder

Instructions for the loaf:
-Pre-heat the oven to 340°F. Line a 9x5x2.5 inch loaf pan (about 8×4 bottom) with foil, covering the sides as well.
-In a bowl, combine the flour, salt, and baking powder. Set aside.
-In the food processor on high, beat the carrots until it’s as ground as possible. That will take a couple of minutes, and make sure to scrape the sides and beat it again to avoid any big pieces being left behind. We suggest alternating between high and pulse here, as the speed change might help getting any stubborn pieces.
-Add in the butter, and beat the mix for a minute or so, until you get a cream.
-With the food processor on low, add in the sugar and the zest, beating again for a minute or two. Scrape the sides.
-With the food processor on low, add in the eggs, one by one. Beat the whole thing again for about two minutes. Add in the juice and the extract, and beat this for a couple of seconds to incorporate.
-With the food processor still on low (last time we’re gonna say this here, promise), gradually add in the dry mix. Beat this only enough to get everything incorporated. If you want to make absolute sure that there are no “unprocessed” surprises on the bottom of the food processor, pour your batter into a bowl and stir it with a silicone spatula before pouring it into the prepared loaf pan.
-Bake your loaf for about 65 minutes, or until it passes the toothpick test. Let it cool down to room temperature before working on the icing.

Ingredients for the icing:
-4 cups powdered sugar
-50g orange juice (no sugar added)
-50g sweetened condensed milk
-Zest of one naval orange
-A few drops of food coloring (orange or yellow), if desired

Instructions for the icing:
-In a microwave-proof bowl, combine the sugar, sweetened condensed milk, and juice. Microwave this for 30 seconds. Stir, add the food coloring drops if you want to, and microwave it for another 30 seconds. If your icing is soft and runny, that means it’s good to go. If it’s not, microwave it for another 30 seconds. This might take several times, just make sure that you do not microwave it for longer than 30 seconds each time you check.
-After your icing is smooth and runny, stir in the zest with a spatula. Pour your icing over your (already out of the baking pan) loaf. Let your icing sit for a couple of hours to dry.

And that’s it!
See you guys soon! In the meantime, don’t forget to follow us on Instagram!

Banana Coffee Cake

20230715_145437

How are you guys doing today?

Do you like bananas? Do you like an easy recipe that takes WAY less effort than what it looks like?
If so, this is your recipe.
You’re gonna need:
-Food processor
-Oven
-9x9x2 square pan + foil (we highly recommend foil for this one as opposed to greasing with butter and flour)
-Bowls
-Refrigerator
Ingredients:
For the crumb topping:
-1 cup all-purpose flour
-1/2 cup brown sugar
-1/4 cup granulated sugar
-1/2 tsp cinnamon
-1/4 tsp salt
-1/2 cup unsalted, cold butter, cut into pieces (we just cut them into Tbsp sizes)
For the cake:
-1/2 cup unsalted butter, at room temperature
-1 cup granulated sugar
-1 large egg
-8oz (225g) banana, ripe, cut into pieces
-1 tsp banana extract
-2 cups all-purpose flour
-1 tsp baking powder
-1/4 tsp baking soda
-1/2 tsp salt
-1/2 tsp cinnamon
-3/4 cup buttermilk
For the glaze:
-1/4 cup confectioners sugar
-1 Tbsp heavy cream
Instructions:
For the crumb topping:
-In the food processor, add flour. sugars, cinnamon, and salt. Pulse for a couple of seconds to make sure it’s well combined.
-With the food processor on low now, add in the pieces of butter, one by one. If needed, change the speed/use the pulse button to make everything crumbly. it won’t take long, probably around 10 seconds.
-Put your crumbs in a container and let them sit in the refrigerator while you proceed with the rest of the recipe.
For the cake:
-Pre-heat the oven to 340°F. Line your baking pan with foil, making sure that all sides are covered.
-In a bowl, combine all-purpose flour, baking powder, baking soda, salt, and cinnamon. Set aside.
-In the food processor, beat the butter, the banana extract, and sugar for a minute. After it gets creamy, add in the egg, and beat this mix for another minute or so. Next, add in the banana slices, and beat this until all of the banana pieces are gone and you just have this creamy buttery mix.
-With the food processor on low,  add in the buttermilk. It’s only gonna take about half a minute to get this combined. Next, with your food processor still on low, gradually add in the flour mixture, beating only enough to make everything combined. If you want to be absolutely sure that everything is smooth, we recommend you pour your batter into a bowl before pouring it into the baking pan. This batter usually doesn’t give us any “bottom of the food processor” problems, though.
-Grab the refrigerated crumbs and cover the top of your cake evenly. To some of you, it may look like a lot of crumbs, but trust us, it’s the right amount.
-Bake it for about 55 – 58 minutes, or until it passes the toothpick test. Remember, each oven is different, so keep an eye on your cake.
For the glaze:
Combine the ingredients with a spoon or a fork. Stir it for half a minute, and it should be smooth and ready to be used. We like to decorate using a confectioners bag, but that’s just us.
Alright, that’s all for today!
See you guys soon! And don’t forget to follow us on Instagram!

Pumpkin Carrot Snack Cake

20230626_190613

How are you guys doing today?

It’s not fall yet, but we got one of our pumpkin puree cans and made this delicious cake.

Let’s get to it.

You’re gonna need:
-Oven
-Food processor
-9x9x2 inch square baking pan

Ingredients:
-1 3/4 cup all-purpose flour
-1 tsp baking soda
-1/2 tsp baking powder
-1/2 tsp salt
-1 tsp ground cinnamon
-1/8 tsp ground nutmeg
-1/2 tsp ground ginger
-1/4 tsp pumpkin pie spice
-1/2 cup canola oil
-1/2 cup brown sugar
-6 Tbsp granulated sugar
-1 Tbsp honey
-1/2 cup sour cream
-1/2 tsp vanilla extract
-3oz/85g carrots (chopped)
-1/2 cup pumpkin puree
-2 large eggs

Instructions:
-Pre-heat the oven to 340ºF. Line your baking pan with foil or grease it and dust it with flour. We used foil.
-In a bowl, combine flour, baking soda, baking powder, salt, cinnamon, nutmeg, ginger, and pumpkin pie spice. Set aside.
-In the food processor, beat the sugars, oil, eggs, and extract for a couple of minutes. Add in the carrots and the pumpkin puree and beat for another 2 to 3 minutes, until everything is creamy and smooth. Don’t forget to scrape the sides. Add in honey and sour cream, and beat it again for another minute.
-With the food processor on, gradually add in the dry mix, beating just enough to combine. After that, pour the batter into a bowl and stir with a spatula to make sure no little bits were forgotten on the bottom of the food processor.
-Pour the batter into the prepared pan and bake it for about 29 minutes, or until it passes the toothpick test. As we always say, trust the toothpick more than you trust the time, as your oven might be different from ours, a different baking pan could affect the baking time, and even different brands of ingredients could possibly do that as well.

That’s it!
We’ll see you guys again soon!

And don’t forget to follow us on Instagram

Applesauce snack cake

20230625_122344

How are you guys doing?
Today we are bringing you guys a super soft applesauce cake. Let’s get to it.

You’re gonna need:
-Food processor
-Oven
-9x9x2 square baking pan
-Two bowls

Ingredients:
-1 1/2 cup all-purpose flour
-1/2 Tbsp baking powder
-1 tsp baking soda
-1/4 tsp salt
-1 1/4 tsp ground cinnamon
-1/2 tsp ground nutmeg
-1/4 tsp ground cloves
-3/4 cup granulated sugar
-1/4 cup dark brown sugar
-1 1/4 cup unsweetened applesauce
-1/2 cup vegetable oil
-2 eggs
-1/2 tsp apple emulsion (optional)

Instructions:
-Pre-heat the oven to 340ºF. Line the baking pan with foil or grease it and dust it with flour. We use foil for this one. Set aside.
-In a bowl, combine flour, baking powder, baking soda, salt, cinnamon, nutmeg, and cloves. Set aside.
-In the food processor, beat the eggs with both sugars for a couple of minutes. After that, add in the applesauce, the extract, and the oil. Beat the whole thing for a minute or two.
-With the food processor on, gradually add in the dry ingredients. Beat it just enough to combine everything.
-To make sure that everything is well combined, pour your batter into a bowl and stir it with a spatula. After that, immediately pour it into the baking pan.
-Bake it for about 28 minutes or until it passes the toothpick test. We never recommend to just trust the time we give you guys, as each oven is different, and even your baking pan could make a difference. That being said, trust the toothpick.

Alright, that’s it!
See you guys soon! In the meantime, follow us on Instagram!

Sweet cornbread

20230622_133101

How are you guys doing?
Today we are bringing to you guys a recipe for sweet cornbread. This recipe calls for unexpected ingredients, but fear not, it tastes really good. Just a reminder, this cornbread is almost like a cake – it is sweet. Also, since it’s very moist, you should store it in the refrigerator.

What you’re gonna need:
-Oven
-9x9x2 square baking pan
-Food processor
-Bowl

Ingredients:
-2/3 cup coconut milk
-3 eggs
-160g granulated sugar
-170g unsalted canned corn (drained)
-1 cup flocão (you can find this ingredient at Brazilian stores – no, there is no substitute for this)
-3/4 cup vegetable oil
-2 tsp baking powder
-160g shredded mozzarella

Instructions:
-Pre-heat the oven to 340ºF. Line your baking pan with aluminum foil or grease it and dust it. We use foil for this recipe. Set aside.
-In the food processor, beat the coconut milk, the eggs, and the sugar for a couple of minutes.
-With the food processor still on, gradually add the corn. Do the same thing with flocão, followed by the cheese. Add the baking powder and beat your batter for a couple of seconds afterward.
-Next, pour your batter into a bowl, and manually stir it with a spoon or spatula, just to make sure the baking powder is well combined. With that done, pour your batter into the prepared baking pan.
-Bake it for about 36 minutes, or until it passes the toothpick test.

That’s it! As previously said, store this cornbread in the refrigerator.

See you guys next time!
Instagram

Guava snack cake

20230318_140110

How are you all doing?
Today we are bringing you guys a guava cake. Not filled with guava, but actually MADE with guava.

Let’s do this.

You’re gonna need:
-Stand mixer + bowl
-Microwave
-Oven
-9x9x1.5 (or taller) baking pan
-1 extra bowl

Ingredients:
-1/2 cup of unsalted butter, at room temperature.
-1 cup granulated sugar
-1/2 cup guava paste
-1/2 cup sour cream
-1/4 tsp baking soda
-1 1/2 cup all-purpose flour
-3 large eggs

Instructions:
-Pre-heat the oven to 325°F.
-Line your baking pan with foil or grease it and dust it with flour. We use foil here.
-In a bowl, combine flour and baking soda. Set aside.
-In the mixer, beat the butter with the sugar until creamy.
-In the meantime, start melting your guava. You’ll have to do this FAST because guava paste goes back to its consistency within a minute or maybe even less. Grab a bowl, put enough guava paste to be either 1/2 cup or more (you do not want to do this process twice, so better to have more than necessary than less here), melt it in the microwave for 30 seconds, and stir a bit, another 30 seconds, stir, and maybe you’ll have to do this once or twice more. You’re looking for a “lava”, bubbly guava paste. As soon as you get this done, measure it to get exactly 1/2 a cup, and add this to your mixer, which is STILL ON, CREAMING THE BUTTER. Beat this for a minute or so, then continue.
(alright, the danger is over now, let’s calm down now, breathe, and follow the rest of the recipe)
-Add in the eggs, one by one, beating for a bit after each addition. Add in the sour cream. Keep beating.
-Add in the flour, gradually, beating only enough to combine everything. Don’t forget to scrape the sides.
-Pour your batter into the prepared pan, and bake it until it passes the toothpick test. It’s on the 38-minute mark for us but remember: each oven is different, so keep an eye on it.

That’s it! This cake is absolutely delicious by itself, but feel free to have it with some coffee 😉

See you guys soon!

Oh, by the way, we have an Instagram page now!

Brazilian Carrot Cake

20230407_172901

Today we are bringing you guys a recipe for Brazilian Carrot Cake. Similar to the Italian one, the Brazilian version also doesn’t have those big pieces of carrot that we can see in the American version. However, the biggest difference between the Italian one and the Brazilian one lies in the frosting, this one is covered with chocolate.

Let’s get to it.

What you’re gonna need:
-Food processor
-Microwave or stove top
-Oven
-Mixer
-9x9x1 3/4 inch square cake pan

Ingredients for the Cake:
-300g raw carrots, chopped, if possible
-1/3 cup + 2 Tbsp of vegetable oil
-3 eggs
-320g granulated sugar
-Pinch of salt
-260g all-purpose flour
-1 tsp baking powder

Instructions for the cake:
1. Pre-heat the oven to 340ºF. Line your baking pan with aluminum foil or grease it and dust it. Set aside.
2. In the mixer bowl, combine all-purpose flour, salt, and baking powder. Set aside.
3. In the food processor, beat the carrots and purée them as much as possible with it. With the food processor still on, add the eggs one by one. Beat them for a couple of minutes. Scrape the sides to make sure that everything is uniform and nothing has been left behind. Then add in the sugar, and beat it for a little while again. Then add in the oil, beating it once more.
4. Turn the mixer on low, and add the carrot mix to the dry mix little by little beating just enough to make sure that everything is uniform. Again, don’t forget to scrape the bowl.
5. Pour the batter into the baking pan, and bake it for about 37 minutes in case you have the exact same baking pan as ours. As usual, we’d advise you to trust the toothpick test more than the time (but it’s good to have an idea of when it’s gonna be baked, right?). Let it cool down to room temperature before making and spreading the chocolate frosting.

Ingredients for the frosting:
-3 Tbsp hot water
-3 Tbsp cocoa powder
-2 Cups powdered sugar
-2 Tbsp unsalted butter
-Chocolate sprinkles (optional)

Instructions for the frosting:
In a bowl combine powdered sugar, cocoa, and hot water. Stir until uniform. Add in the melted butter, and stir again. Spread the frosting on the cake. Decorate with chocolate sprinkles if desired.

That’s it for today!
See you guys soon!

Chocolate Orange Rum Cake

20230302_135101

Hello once again!

Today we are bringing to you guys a recipe for a layered cake. Blondie likes to make her cakes very well layered. 4 to 5 layers of filling is what you’re gonna get with this recipe here. Before we keep going, we strongly advise you to make the filling and the buttercream the day before, since we’ll have many steps (and dirty dishes) with this one. That being said, let’s jump to the recipe.

What you’re gonna need:
-Stand Mixer
-Oven
-2 7″ round pans. (3″ tall)
-A big cooking pot

For the cake, you are going to use this recipe, but ignore the baking time of it, since we’re going to bake this cake in a different pan size. Don’t forget to grease and dust the pans. Bake your cake at 340ºF for about 40 minutes, or until it passes the toothpick test. Don’t forget that you have to wait until your cake has cooled down completely to room temperature before adding the filling and finishing it with the buttercream.

Ingredients for the filling:
-150g dark chocolate (90%)
-590g sweetened condensed milk (1 1/2 can)
-335g table cream  (1 1/2 can)
-6 Tbsp rum (any spiced/gold rum of your choice)
-4 1/2 tsp rum extract

Instructions:
In a big pot over low heat, cook all the ingredients, stirring constantly. Cook it until it reaches a thick pudding consistency. Let it cool down to room temperature before use. If you make it the day before, you can keep it either at room temperature or in the refrigerator. Just remember to let it reach room temperature before using it.

Did you end up with filling that is too thick to be spreadable? You cooked it for too long. Don’t worry, you just have to stir in some table cream to make it a bit softer.

For this filling, it’s better to overcook it than undercook it. If you undercook it, you’ll have a filling that won’t stay put. Hopefully soon we’ll have a video for it, and whenever that happens, there will be a link right here.

Frosting:
For the outside, cover the cake with our Chocolate Orange Buttercream. One recipe of it will be enough for your cake.

That’s it for today! We’ll see you guys soon!

Vegan Italian Orange Carrot Cake

20230329_100535

This is the vegan version of the Italian Carrot Cake that we brought to you guys a couple of days ago. If you want to see the regular recipe, click here

You’re gonna need:
-Food processor
-Mixer
-Oven
-Baking pan (I used a 9x9x2 inch square cake pan)

Ingredients for the cake:
-2 cups pastry flour
-1 1/2 tsp baking powder
-7oz (200g) carrots, chopped
-3/4 cup salted vegan butter at room temperature
-3/4 cup granulated sugar
-3 1/2 tbsp egg replacer (we used Bob’s Red Mill)+ 5 tbsp water
-1 tsp orange extract
-1/4 cup orange juice (100% juice, no pulp)

Instructions for the cake:

1- Pre-heat the oven to 340ºF. Cover your baking pan with aluminum foil or grease it and dust it, your choice here. We always pick the foil. If you are going to grease it, we do not recommend the salted vegan butter, because that might make your cake too salty. Use Crisco for this step instead.

2- In a bowl, combine the pastry flour and baking powder. Set aside.

3- In a small bowl, combine the egg replacer and the water. Make sure that the powder is very well combined with the water. Set aside as well. This should rest for a couple of minutes before being used.

4- In the food processor, beat the sugar, butter, carrots, orange extract and juice. Keep beating until all the carrot pieces are gone and you have a somewhat well combined cream. Some tiny bits of carrots might be unavoidable, and that is okay. Add in the egg replacer mix, and beat some more, for maybe 2 or 3 minutes.

4- Pour the vegan butter mix into the mixing bowl, and with the mixer on low, add in the dry mix to it, little by little, mixing just enough until everything is well combined. Don’t forget to scrape the sides.

5- Bake it for about 25 minutes (if you have the exact same size of baking pan, of course), or until the cake passes the toothpick test (that is, when you insert a toothpick right in the middle of the cake and it comes out clean or with very few dry crumbs). Let the cake cool off to room temperature before covering it with frosting.

Ingredients for the vegan chocolate frosting:
-100ml coconut milk
-3 1/2 tbsp dutch cocoa powder
-3 1/2 tbsp granulated sugar

Instructions for the vegan chocolate frosting:
-In a saucepan, on low/medium heat, stir all 3 ingredients constantly until all the sugar is dissolved. That’s it. Your frosting is ready to be used.

Alright, that’s it for today! We’ll see you guys again soon!